How flip teaching supports undergraduate chemistry laboratory learning
Tang Wee
Teo
*,
Kim Chwee Daniel
Tan
,
Yaw Kai
Yan
,
Yong Chua
Teo
and
Leck Wee
Yeo
Natural Sciences and Science Education (Academic Group), National Institute of Education, Nanyang Technological University, 1 Nanyang Walk, NIE7-03-83, Singapore 637616. E-mail: tangwee.teo@nie.edu.sg; Fax: +65 896-9414; Tel: +65 6790-3830
First published on 23rd April 2014
Abstract
In this paper, we define flip teaching as a curricular platform that uses various strategies, tools, and pedagogies to engage learners in self-directed learning outside the classroom before face-to-face meetings with teachers in the classroom. With this understanding, we adopted flip teaching in the design and enactment of one Year 1 and one Year 2 undergraduate chemistry laboratory session at a higher education institution. The undergraduates viewed videos demonstrating the practical procedures and answered pre-laboratory questions posted on the institution's mobile device application before the laboratory lessons. Analyses of the lesson videos, interviews with the undergraduates and instructors, and undergraduate artefacts showed that the undergraduates had developed a better understanding of the theory undergirding the procedures before they performed the practical, and were able to decipher the complex practical procedures. They also experienced less anxiety about the complex practical steps and setup, and subsequently, improved work efficiency. The findings of this study have implications for chemistry educators looking for ways to improve on the design and enactment of the laboratory curriculum to enhance the undergraduates' self-directed learning.
Introduction
Flip teaching has gained a considerable amount of attention in recent years, receiving coverage in the US and UK. media such as The Economist, Wired, and The Daily Telegraph. This is, in part, because flip teaching challenges the conventional order of teaching and learning where students first undergo instruction in the class and then do their homework outside the class. The main purpose of flip teaching is to ensure that curriculum time can be better used to actively engage students in learning rather than focussing on didactic teaching. A key feature of flip teaching is the use of technology to substitute in-class direct transmission of information. Flip teaching is, however, not simply about the adoption of technology alone. Drawing from our experience researching on flip teaching, we understand it to entail a change in mindset about the curriculum—what constitutes a “lesson”, what students and teachers do during out-of-classroom time and in face-to-face meetings, what content is to be taught and learned, what is the sequence of learning activities, what is the scope of a lesson, what are the appropriate pedagogies to deliver the content, and what are some learning strategies students can use. In other words, flip teaching does not refer to a set of teaching strategies but a curricular platform embodying a broader set of curricular considerations aimed at increasing student active participation in their education.This paper describes an exploratory research that examines the use of flip teaching as an alternative chemistry laboratory curriculum model at a Singapore tertiary institution focusing on teacher education at both undergraduate and postgraduate levels. The research question that guided our inquiry was: How does flip teaching support the undergraduates' chemistry laboratory learning? Two science and two science education faculty members who are authors of this paper collaborated on a larger study to examine strategies that support more active student learning in laboratory lessons. The third and fourth authors were also the instructors of the chemistry laboratory courses being studied. This study focussing on flip teaching was a continuation of an earlier baseline (unpublished) study of the curriculum that identified areas of improvement for facilitating student learning.
The baseline study investigated how the undergraduates prepared for their chemistry laboratory lessons in the traditional setting, which typically involved the instructors giving a pre-laboratory briefing (that lasted 30 minutes on average) on the procedures the undergraduates would undertake for the session, and provided a general overview of the chemical reactions that would take place during the practical. The undergraduates spent the rest of the session completing the practical, aided by a laboratory manual that detailed the broad steps required to complete the practical. A week later, they would submit a laboratory report which would be graded. From the pre- and post-laboratory surveys and interviews with the undergraduates we found that the practicals were often done in a rushed manner as the undergraduates had only three hours to complete their laboratory work. This resulted in them not having enough time to think about what they did in the laboratory and link the practicals to the theories taught in lectures. Despite the pre-laboratory briefings, the undergraduates had minimal understanding of the chemistry concepts undergirding the practical procedures. Further, they did not receive detailed feedback on their performances during the laboratory sessions as there was usually no time for post-lab debriefs. The undergraduates expressed a desire for instructors to provide explicit links between the theory and practice, with suggestions such as having instructors explain why it was necessary for certain steps to be done before others.
Based upon the findings, the research team identified flip teaching as one plausible curriculum model to address the above findings. We, the authors, posited that the flip teaching approach was appropriate in the research context as the undergraduates were expected to be able to learn independently and read up on the practicals to make sense of the practical procedures, reagents, apparatus, setup, and chemical reactions before they carried out the practicals. This paper reports on the flip lesson design and implementation in two chemistry laboratory sessions in the new academic year following the baseline study.
Objectives of the study
While most studies on flip teaching reported on the advantages and disadvantages of flip teaching and learning, we were interested in the process of flip teaching and learning. In particular, we wanted to know how the undergraduates had harnessed the flip lesson curriculum resource (the detailed video demonstration of the practical procedure) for their own learning. We apply an epistemic lens to examine and understand how teaching and learning had occurred as a result of flipping the laboratory lesson. The flip lesson included: (1) providing the demonstration video to the undergraduates before the laboratory lesson, (2) restructuring the laboratory lesson to include post-laboratory feedback and reduced pre-laboratory briefing, and (3) changing the laboratory lesson discourse to include more in-depth discussion on the theory undergirding the laboratory processes. We aimed to understand how epistemological gains could be made, through flip teaching, at the nexus of episteme–techne in the curriculum space of the laboratory. According to Aristotle (cited in Flyvbjerg, 2001), “[E]pisteme concerns theoretical know why and techne denotes technical know how“ (p. 56, emphasis in original). In the context of the science laboratory, the theoretical know why refers to the scientific theory underpinning the processes and the technical know how refers to the practical techniques and skills.To our knowledge, no previous empirical studies had reported on flip teaching in the context of science laboratory lessons as most studies focused on lectures and classrooms. Chemistry instructors in schools and higher education contexts interested in improving the quality of science laboratory teaching and learning may be interested to learn how flip teaching can be applied in science laboratory context. The findings and discussion in this paper will provide insights into how flip teaching may enhance the quality of science laboratory learning, both in schools and in tertiary institutions.
In the section that follows, we discuss the literature on the limited impact of science laboratory work on student learning. Next, we discuss what has been reported about flip teaching. Due to the lack of prior studies on flip teaching in science laboratory contexts, our review includes empirical studies on flip teaching in classroom and lecture settings, and science and non-science lessons. Finally, we offer our own definition of flip teaching.
Discussion of the literature
Laboratory work
Laboratory work plays a central role in science education and it generally refers to activities in which students manipulate equipment, handle material, and make observations for the sense-making of phenomena (Hofstein et al., 2013). Laboratory work is considered to be important in students' learning of science because it is able to facilitate the understanding of scientific concepts and the nature of science, provide opportunities to learn inquiry skills and problem solving, cultivate scientific habits of mind, and help students develop positive attitude towards science and the learning of science (Nakhleh et al., 2002; Hodson, 2005; Hofstein et al., 2013).However, laboratory work may have limited impact on students' learning of science if the activities are “prescribed from a given bank of recipes and routines, typically of an undemanding nature, which ultimately trivialized the activity” (McNally, 2006, p. 426). Most students learn that they only need to follow instructions and perform the required analyses in laboratory work to obtain satisfactory results (Montes and Rockley, 2002). They are inclined to focus “on those aspects of the task that they believe will gain them the most credit in terms of course grades” (Tiberghien et al., 2001, p. 487). Students tend not to see the importance of linking what they do during laboratory work with theories that they learn in the class, so they have little theory to guide them in the activities that they do (Hart et al., 2000; Tiberghien et al., 2001; Sere, 2002). With little understanding of the purpose of the apparatus and procedures, and what they should observe and measure from the practicals, Sere (2002) argued that students were not able to engage meaningfully in laboratory work. Chittleborough et al. (2007) addressed this problem using online pre-laboratory exercises in an introductory first year university chemistry course. They found that it had allowed greater flexibility in the undergraduates' use of time and the place where they did the exercises, freed up more time for providing feedback on the students' responses, and provided the opportunity for students to learn from their mistakes with no penalty for incorrect answers. As compared to reading the laboratory manual alone, the undergraduates were more well-prepared to do the practicals as they understood the theory behind the procedures, and the type, use, and choice of apparatus before they perform the practicals.
Chittleborough et al.'s (2007) study showed that pre-laboratory exercises could be incorporated in a flip science laboratory lesson. In the flip laboratory lessons we designed, the undergraduates also had to answer pre-laboratory questions. Below, we discuss flip teaching and how it has been used to address some limitations of teaching and learning.
Flip teaching
Even before information and communication technology (ICT) became commonplace in the society, teachers had, at times, required students to complete readings before a lesson so that the curriculum time may be freed for other learning activities (Strayer, 2012). However, the advancement of ICT has allowed content delivery outside class to be more accessible, faster, and engaging than before (Chittleborough et al., 2007). Growing up with digital technology, students of today are often familiar with and constantly engaging with various digital devices. The current generation of Digital Natives (OECD, 2006) are therefore able to learn effectively through ICT.The use of technology to replace predominantly didactic in-class lectures first emerged in education literature about a decade ago when terms such as “classroom flip” (Baker, 2000; Foertsch et al., 2002) and “inverted classroom” (Lage et al., 2000) were mentioned. Since 2005, when the video-sharing website YouTube was founded, the ability for any individual to create and share video content was made possible (Wesch, 2008), and the immense popularity of Khan Academy's micro-lecture videos exemplified the potential of video lessons (Khan Academy, 2013). Not long after, several U.S. high school teachers such as Karl Fisch, and Aaron Sams and Jonathan Bergmann began practicing flip teaching (Pink, 2010; Bergmann and Sams, 2012), which received attention and was promoted by the media as an active way to engage students.
| Type of lesson | Pre-lesson | During lesson | Post-lesson |
|---|---|---|---|
| Traditional | Teacher-centred lesson i.e. students sit and listen most of the time | Students do homework related to what is taught in the class | |
| Flip | Self-directed or peer learning | Teacher-facilitated lesson i.e. students work on practices related to the pre-lesson activity | Students have no homework, work on practices that are more challenging, or prepare for the next lesson. |
The flip classroom provides teachers with greater flexibility over the classroom time as students have the time to engage lesson content at a deeper level. This is, at times, achieved by having students use technology to complete rudimentary study of basic concepts (i.e. through online lectures) ahead of time, so that they will be ready for deeper learning during the class. In our review of the literature, we found fundamental differences in the traditional and flip teaching models in terms of the epistemological beliefs about students, teachers, and learning. We unpack some of these and present them in Table 2 below.
| Traditional didactic teaching | Flip teaching | |
|---|---|---|
| a Note that while we are aware that not all students will learn on their own before class, it is not the focus of this paper to discuss this issue. This is because there are just as many reasons why students may not have done their reading before class as not doing their homework. For example, the activity is not interesting to students or that they have personal matters to attend to which distracts them from their work. The responsibility of the teacher is to ensure that curriculum activities are meaningful to students and that there is continuity from the pre-lesson activity to the during class activity so that students will be motivated to complete the assigned tasks before class. | ||
| Student motivation | Students are viewed as unable or unmotivated to learn on their own. | The use of IT and student-centred activities will entice students to learn on their own or with their peers. |
| Student knowledge | Students come to class with a blank slate to consume knowledge from teachers. | Students are social agents and co-constructors of knowledge. Students are equipped with the relevant knowledge to learn when they go into classa and hence, teachers can build on that prior knowledge common among students. |
| Student work | Students will be able to do their homework after the teacher has taught them the content. | Students need further support from teachers and peers to do their work as they may not have attained complete understanding of the topic. |
| Teacher role | Teacher has authority and represents expert figure in the class. | Teacher plays a facilitator role in supporting students' learning in and outside the classroom. |
In our review of empirical (Table 3) and non-empirical literature we found flip teaching to consist of common characteristics in each of the following domains:
| Source | Research context | Home activities | Class activities | Selected outcomes of flipping | |
|---|---|---|---|---|---|
| Positive | Negative | ||||
| Davis et al. (2013) | Undergraduate course in the introductory spreadsheet course | Textbook reading, videos supported by thought-provoking problems, complete homework and exams in MS Excel. | Class attendance optional. | Optional attendance allowed students better use of their time. Flipped classes can easily accommodate large classes. Students are able to pace themselves based on their own level of understanding. | Requires greater upfront investment for development of video resources. |
| Foertsch et al. (2002) | Undergraduate course in Computer Science | Video streaming software, eTEACH® and quizzes. | Individual computer tutorial, and three-person computer problem solving. |
More convenient and conducive to learn from video.
Improved conceptual understanding through collaboration. |
Requires more self-discipline. |
| Gannod et al. (2007) | Undergraduate course in Service oriented architecture and web services | Video blogs, PowerPoint with voiceovers, screencast. | A variety of class activities, primarily application development assignments. |
Positive reception to the inverted classroom model. Appropriate in-class activities.
Podcast was an effective learning tool. |
Not all students were engaged during in-class activity. |
| Johnson and Renner (2012) | Two high school courses in Computer Application | Completing textbook tutorial, supported by Adobe Flash screencast video. | Completing computer project in pairs without teacher support. |
Increased on-task discussions.
Evidence of higher level thinking. |
Students not motivated. Students do not automatically prefer cooperative group work. |
| Lage et al. (2000) | Undergraduate course in Economics | Videotaped lectures/audio-guided PowerPoint, and worksheets. | Experiment/labs, worksheet discussion, review questions. |
Students and instructors favorably impressed.
Increased one-on-one interactions. |
Higher set-up cost. |
| McGivney-Burelle and Xue (2013) | Undergraduate course in Calculus | Two to three short online videos, complete sample problems. | Entrance quiz at the start of every lesson to assess pre-class preparation, small group problem solving. | Improved exam performance over control group. Students liked videos. Preference for working on challenging problems than listening to lecture in the class. Working at their own pace in the class, having instructor help when working on problems. | Some did not like not able to ask questions when watching videos. Video creation was time consuming. |
| Pierce and Fox (2012) | University course in Pharmacy | Video streaming through iTunes U. |
Process-oriented guided inquiry learning (POGIL) activity:
Stimulated patient care, calculations, student-centred discussions. |
Increased opportunities for knowledge application through in-class activity. Significant exam performance improvement. Students' preference for flipped classroom. | |
| Smith (2013) | Undergraduate course in general chemistry | Narrated PowerPoint presentation streamed through “Mediasite” software, online homework. | Graded follow-up quiz questions, non-graded questions that allow for group discussions sometimes. | Videos perceived as useful and easy to use. 5–7 minute videos found to be appropriate in length, flipped classroom perceived to be effective. Quiz questions useful for reinforcement. In-class problem solving made class more engaging and enlightening. | Students found homework videos burdensome in terms of time. |
| Strayer (2012) | Undergraduate course in Statistics | Intelligent tutoring system, ALEKS. |
Varied activities.
To engage content in different context from ALEKS. |
More cooperation than traditional classroom. | Lower task orientation. More likely to plug numbers into formulas and disengage when activities got boring |
| Wilson (2013) | Undergraduate course in statistics | Textbook reading quiz, encouraged to access “Khan Academy” website for statistics videos, homework assignment. | Varied activities, course content reflection, group homework assignment discussion. | Students found class activities beneficial. Course grade improvement. | Some perceived increased outside-class responsibilities as unfair or unreasonable. |
| Zappe et al. (2009) | Undergraduate course in architectural engineering | Online videos on iTunes U, online quizzes. | Group projects | Flipped classes, increased time spent on problem-solving. Having instructors during in-class activities were helpful for content understanding. Group projects in the class were perceived as good use of time. | Fifty-minute, and subsequently reduced to 30 minute videos were perceived as too long, half of students found it easy to be distracted watching the videos. |
• Curriculum structure—The curriculum time is extended to before formal class time to provide extended curricular platforms for non-teacher directed learning to take place outside the classroom (see Table 1).
• Power structure—Students play a key role in making decisions on what, how, and when they learn outside class. In the class, they participate in the active co-construction of knowledge with their peers and teachers.
• Mindset—A change in thinking and perception about student and teacher roles, students' ability to learn on their own, places where learning and teaching can take place, and the order of teaching and learning.
• Pedagogical tools—Teachers will direct students to learn using ICT-based resources accessible outside the classroom and then build on what students have learned in the class.
Based on our synthesis of the above information and experience doing flip teaching, we define flip teaching as follows:
Flip teaching is a curricular platform that uses various strategies, tools, and pedagogies to engage students in self-directed learning outside the classroom before face-to-face meetings with teachers in the classroom.
Methods
In this section, we describe the methods of the study including the design of the flip chemistry laboratory curriculum being studied, the research participants, and the research methods in data collection and analysis.Flip chemistry lesson
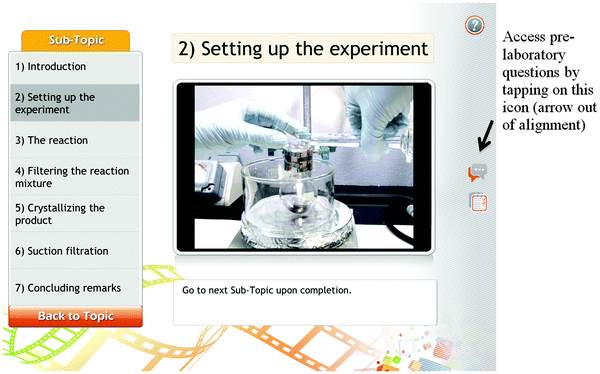
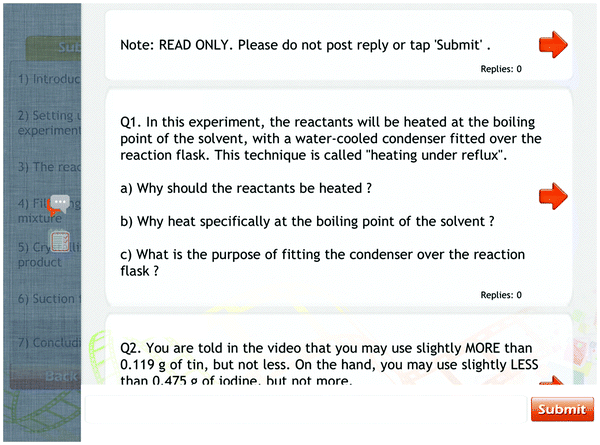
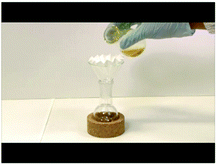
The instructors required the undergraduates to view the video on a web browser or smartphone application (App) designed and produced by the institution at which this study was carried out. The two instructors teaching a Year 1 Inorganic Chemistry and a Year 2 Organic Chemistry course, respectively, each selected one out of three or four laboratory sessions in the course to be a flip lesson. The instructors prepared a script and narrated it as they conducted the practical. The entire practical process was video-recorded and edited by media engineers. The video editing included segmenting the video into shorter clips named according to the practical procedures carried out. A week prior to the laboratory lesson, the undergraduates were informed of the App which they could download at no cost on Android or iOS supported mobile devices (e.g., cellphones, mobile pads, and tablets) and given the password to access the video clips posted in the channel created for each course. Alternatively, if the undergraduates did not own a smartphone, they could view the video on the institution's online learning and resource platform. The undergraduates could view the video clips any time and anywhere with Internet access, rewind, forward, pause, and skip the video recordings according to their pace of learning. Fig. 1 below shows two screen shots of the videos viewed on a mobile device.Table 4a and b show the curriculum structures of the two flip laboratory lessons and those of the same practicals conducted in the traditional way the year before. In order to actively engage the undergraduates to think about the chemistry underlying each step in the laboratory procedure before carrying out the practicals, pre-laboratory questions were posted online (see Fig. 1 icon on the right). The undergraduates were required to submit the answers at the beginning of the lesson. The instructors would engage them in a whole class discussion about the questions to ensure that all students had the correct understanding. During the laboratory work, the undergraduates were allowed to refer to the videos on their mobile devices when they needed to troubleshoot. In one flip lesson, time was set aside at the end of the lesson to conduct a whole class debrief about their laboratory performance. Note that the undergraduates still had to do their laboratory report as homework as it was a graded assignment and there was not enough time in the class to complete the detailed laboratory report.
| Type of lesson | Pre-lesson | During lesson | Post-lesson |
|---|---|---|---|
| (A) | |||
| Traditional (baseline study) | Undergraduates read laboratory manual without guidance | Pre-laboratory briefing (23 min) | Homework: laboratory report |
| Lab work (158 min) | |||
| Flip laboratory lesson | Undergraduates read laboratory manual complemented with demonstration videos (13 min long), and answer pre-laboratory questions | Pre-laboratory discussion (14 min) | Homework: laboratory report |
| Lab work (113 min) | |||
| Post-laboratory debrief (17 min) | |||
| (B) | |||
| Traditional (baseline study) | Undergraduates read laboratory manual without guidance | Pre-laboratory briefing (23 min) | Homework: laboratory report |
| Lab work (158 min) | |||
| Flip laboratory lesson | Undergraduates read laboratory manual complemented with demonstration videos (13 min long) and answer pre-laboratory questions | Pre-laboratory discussion (9 min) | Homework: laboratory report |
| Lab work (142 min) | |||
Research participants
The research participants of the study included 11 Year 1 (four males and seven females) and 21 Year 2 (10 males and 11 females) undergraduates who had given informed consent to participate in the study. Those who were below the age of 21 provided both informed assent and parents' consent. About 30% of the Year 2 undergraduates were chemistry majors. Year 1 undergraduates choose their majors at the end of the first semester in their first year of study but are allowed to make changes until the end of their second year. More than 95% of them owned a smartphone and all of them owned a personal laptop. The undergraduates were also pre-service teachers, and would take courses in pedagogy in their third and fourth years and do their teaching practice in their second, third and fourth years.Data collection
The data collected include student interviews, lesson videos, and student artefacts. We summarised the data collected in Table 5. All interviews and videos were transcribed.| Data collected | Quantity of data | Remarks or comments |
|---|---|---|
| Instructor interviews |
• A total of 2 interviews (one each with one Year 1 & one Year 2 undergraduate)
• Total duration: 36 min |
Sample questions asked:
• Why did you choose to flip this practical? • How did you flip your lesson? |
| Student semi-structured interviews (end of course) |
• A total of 6 interviews (one each with three Year 1 & three Year 2 undergraduates)
• Total duration: 3 h 30 min |
Sample questions asked:
• How was the lesson different from a standard lesson? • Did you find yourself working differently in this flip practical lesson? |
| Student informal interviews (during flip lesson) |
• A total of 12 interviews (one each with six Year 1 & six Year 2 undergraduates)
• Total duration: 54 min |
Sample questions asked:
• How did you use the video to prepare for the lesson? • How long did you take to watch the videos? • How did it affect you learning? |
| Student stimulated recall interview |
• 1 interview with one Year 1 student
• Total duration: 11 min |
We showed one Year 1 undergraduate a video clip of herself referring to the demonstration video recording as she was doing the practical. We asked what she was doing and why she referred to the video. The purpose is to gain insights into how students use the videos in the class. |
| Lesson observations |
• 2 laboratory lesson videos (one Year 1 & one Year 2 laboratory)
• Duration: 3 h per lesson |
We video-recorded how undergraduates carried out the practical. |
| Student artefact | • 1 photograph taken from a Year 1 undergraduate laboratory manual | The annotated laboratory instruction sheet showed how the undergraduate used the video to make sense of the procedures. |
Data analysis
The lesson video transcriptions, interview transcriptions, and artefacts were independently coded using qualitative methods by two of the researchers. We used the constant comparative approach (Glaser, 1965) in coding the transcriptions. First, we examined the photograph of the student's annotated laboratory handout and interview transcripts to code for how the undergraduates used the demonstration videos when they were preparing for the laboratory lessons. Some emergent codes include unpacking steps, making notes, and answering pre-laboratory questions. During the coding process, when new codes were identified from reading the transcriptions we looked back at the previous coded transcriptions and re-coded them again. The process was iterative. Then we coded the lesson video transcription, in particular, the pre- and/or post-laboratory briefings during which questions posted on the App were discussed. Only one laboratory lesson had a post-laboratory briefing. We coded the transcriptions for example on the discussion of theories and concepts and how these deepen the undergraduates' theoretical understanding of the laboratory processes. Any differences in the coding (e.g., codes used and excerpts coded) were negotiated until a common agreement was reached.Findings and discussion
In this section, we describe the two flip laboratory lessons and present the undergraduates' perspectives of their learning experience in these lessons. How the flip curriculum supported the undergraduates' learning in laboratory classes will be the focus of our discussion.Year 1 practical on synthesis of tin(IV) iodide
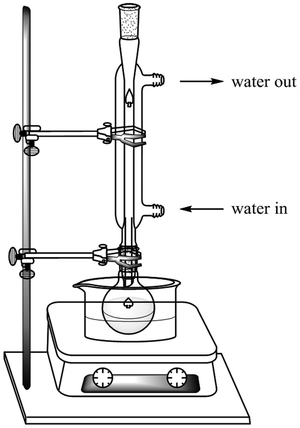
In this practical, the undergraduates were tasked to synthesise tin(IV) iodide by refluxing the starting reagents followed by filtration and recrystallisation to obtain the pure product (refer to Appendix A for the complete practical procedure).When the instructor met the undergraduates in the class, he discussed the pre-laboratory questions with them. The pre-laboratory briefing took about 14 minutes and the instructor probed for the undergraduates' understanding on why they should be doing the things stated. The excerpt below provides an idea of the discussion about questions 1(a) and 1(b) in Fig. 2.
Excerpt from the pre-laboratory briefing:
Instructor: In this experiment, the reactants are heated at the boiling point of the solvent. Okay, so this is how the apparatus looks like right? [pointing to a demonstration set of the apparatus] You heat your reaction mixture here and the condenser that is cooled by water is plugged onto it. So this is called heating under reflux. So why should the reactant be heated? Anyone?
Student A: Increase the rate of reaction.
Instructor: Increase rate of reaction, is that the only reason? Can anybody think of any other reason?
Student B: provide energy.
Instructor: So as to…?
Student B: To form the bond.
Instructor: To form the bond. So you are saying to overcome the activation energy. But it's the same as what he [Student A] is saying right? To increase the rate of reaction. If you provide more energy for it to overcome the activation barrier, you are actually increasing the rate of reaction right? Ok, basically that is the main reason.
(…)
Secondly, why do we heat specifically at the boiling point of the solvent? In principle we can heat it to any temperature we like right? And still the reaction rate will be increased, so why specifically at the boiling point of the solvent?
(…)
The boiling point is the maximum temperature you can achieve for a particular solvent right? So heating at the boiling point means you are maximising the rate for this solvent right? So that is the reason why you heat at the boiling point. Because that is the highest temperature you can reach, and that's to maximise the rate of reaction. Another reason is the boiling point is always constant right? So that makes your reaction more easily controlled and reproducible.
In Singapore, the concept that heating increases the rate of reaction is introduced in secondary schools. In the above excerpt the student had applied this prior knowledge to answer the instructor. While the concept was correct, the instructor wanted the undergraduates to elaborate further. One of the undergraduates showed his understanding on why heating would result in a faster rate of reaction. The instructor built on his response to explain that it was due to the overcoming of the activation barrier of the reaction.
In the flip laboratory lesson, the undergraduates could view the demonstration video before lesson. They were informed about the steps, ways to setup the apparatus, the observations they could make, and the safety precautions they should take. When they were in doubt while doing the practical, they could refer back to the videos instead of waiting for the instructor to address their query (lesson observation video, March 1, 2013). As such, more time was freed up for the post-laboratory briefing to review the laboratory lesson that was done.
Instructor: The colour changed from violet to yellow very very quickly. And some changed quite slowly. What do you think are the reasons? (…)
Student: The tin is clumped up, so surface area is smaller, so basically slower.
Instructor: Ok, do you all understand? It is a reaction of a solid with a liquid, right?
Student: [inaudible] large pieces of [inaudible]
Instructor: Yes, in such cases, the larger the surface area of the solid, the faster the reaction. The tin is in powder form, so if you don't stir sufficiently well, it will clump together and that will reduce the effective surface area of the tin. So those of you whose reaction went quite fast, generally it was because you stirred vigorously enough, to keep the tin well dispersed.
(…)
Instructor: Okay for the suction. You noticed in the video what I did. After I turned off the suction, before I added the chloroform for washing, I actually pulled out the funnel right? It goes “poof”. Because if you don't do that there is still partial vacuum in there. When you add the washing solvent it will go straight through, it wouldn't cover the product. Then the washing would not be even and effective.
Some of the above ideas were again related to the concept of the rate of reaction, in particular, the effective surface area of the substance. While it was intuitive to stir a mixture during heating, the undergraduates now learned that vigorous stirring was necessary when the particle sizes were small to prevent them from aggregating together and hence slowing down the reaction.
The instructor also reminded the undergraduates that he had demonstrated in the video to release the vacuum before pouring in the washing solvent. This was a technique not discussed in books but based upon his experience doing suction filtration. The undergraduates' understanding would be reinforced in the class if they had viewed the video before the lesson.
Year 2 practical on Wittig synthesis
In this practical, the undergraduates were tasked to carry out Wittig synthesis. The procedure included reaction, extraction, filtration, and recrystallisation to obtain the pure product (refer to Appendix B for the complete practical procedure).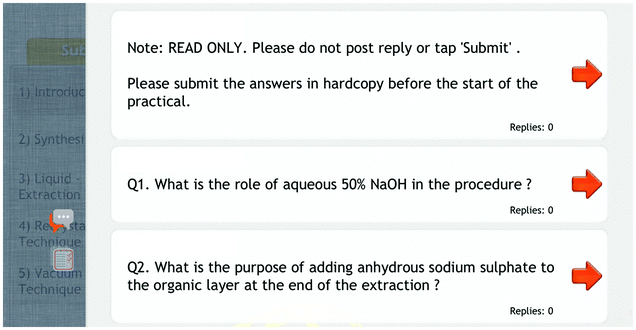 | ||
| Fig. 3 A screenshot of the pre-laboratory question page of the demonstration video for Wittig synthesis. | ||
At the beginning of the lesson, the instructor discussed the pre-laboratory questions with the undergraduates. Below is an example extracted from the pre-laboratory discussion the instructor had with the undergraduates.
Instructor: What is the role of the 50% sodium hydroxide in the procedure? Anyone? [silent]
Student: [inaudible]
Instructor: Form an ylide. Okay, because, remember... [Writes on board] Once you have a [draws on the board] this is the bromide you are using—the triphenylphosphonium bromide. So to form the ylide you need the [draws on board] base to abstract the proton, so that you generate your [writes on board] negatively charged ylide. This ylide can then react with your [draws on board] aldehyde to form the double bond. But! The 50% NaOH serves more than this purpose. [Projector flashes diagram and answer]
(…)
Instructor: What is the purpose of adding anhydrous sodium sulphate to the organic layer at the end of the extraction step? Anyone?
Student: Dry the organic layer.
Instructor: Right, because during extraction you might bring over some residual moisture into your organic extracts. So the addition of this anhydrous sodium sulphate is to ensure that your organic extract is free of residual water. [Projector flashes answer] So the purpose is to remove the residual water that is still present in the organic extract. So this is the reason why we add anhydrous sodium sulphate. So you must add adequate amount, to ensure that the organic layer is dry.
As opposed to answering the questions in the laboratory report, the instructor had brought forward the questions and undergraduates had to answer the questions for submission beforehand. As such, they had to do some self-reading in order to answer the questions and understand what they were doing before they carry out the practical. They could validate their understanding through the pre-laboratory discussion. For example, in the above excerpt the student would understand the purpose of the anhydrous sodium sulphate rather than just go through the procedure of adding and filtering without knowing its function.
Supporting students' laboratory learning
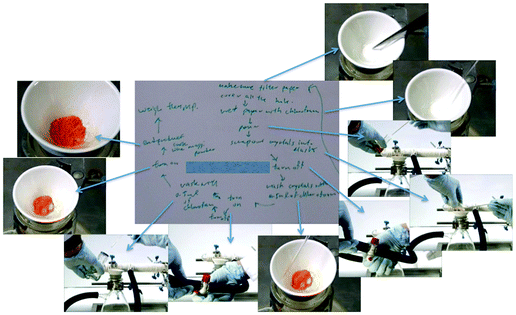
Fig. 5 shows how the student's annotations corresponded to the videos.
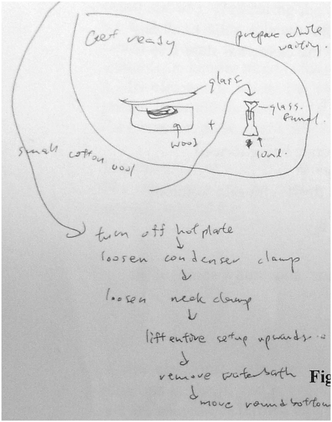
As the student watched the flip video, he unpacked the finer details required in gravity filtration. His annotations were in the form of a flowchart to provide a mental picture of the sequence of steps and apparatus needed. Below is an interview excerpt from another student (Y1-3) who described how the video had helped him:
[The video contains] a lot of the small details. If you actually watch the video carefully, you will pick up a lot of the small details that he [the instructor] does. Because, I mean, you are actually watching him carrying out the experiment, which I think if we were to do without [the video]; you are just reading it [the instruction], you probably miss out stuff like: When using the vacuum funnel, he switches off the Buchner funnel; he takes it out when he is washing the thing, so that there isn't the partial vacuum there. But I think most of us, we just pour in the stuff even though the vacuum is switched off. There is still the partial vacuum, which we will not really care about. Even if you mentioned it, it is something that you might miss. (Student Y1-3, informal class interview, March 1, 2013)
We observed that several undergraduates referred to the videos during the lesson. We conducted a stimulated recall interview with one Year 1 undergraduate (Y1-1) to find out more about why she brought her mobile device into the laboratory. She was shown the video segment (recorded during the laboratory session) in which she was referring to the demonstration video on her mobile device. She said:
Because I actually watched the video prior to the experiment but there was like a lot of small little few details that he [instructor] included like: For the cork stopper you have to like let it loose for a little, give it some air or something. (…) Then I was just scared that I couldn't remember and that they were crucial to the experiment. (Student Y1-1 undergraduate, interview, 17 May 2013)
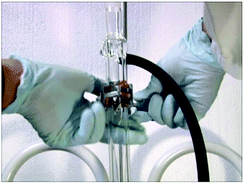
She described her laboratory experience as “intimidating”. She explained, “Cause you have to like put the water in, then put the water out. I think I was looking for where to clamp? ‘Cause it has to be like at a certain height, so that it doesn't get loose or something.” There were many details and aspects of a practical setup that needed to be considered and she felt “intimidated” because she had to ensure that she was doing the right thing at every step else she had to repeat the entire practical. She was also looking for the amount of liquid to add into the flask as the information was not specified in the laboratory instruction sheet. Even after looking at her classmate's setup she was not sure that he was doing the right thing. A student (Y1-4) said that after taking notes, she rewrote her own instructions which she found to be clearer than the ones provided for her. Another student (Y1-10) commented that he was able to pick out some details from watching the instructor's actions in the video even though it was not explicated verbally. The student (Y1-10) said,
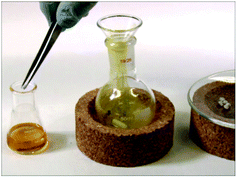
Also, one thing he [the instructor] didn't mention, but he did was, when he filter out the… reaction mixture into the small Erlenmeyer flask. There is a tiny bit of cotton wool to filter out the excess tin. And in the video, you see him quite obviously pressing it down with the tweezers, which I think all of us will not even bother to do. And it's not the sort of thing that you would put in the instructions. Because some things you just don't put in instructions, because it seems so logical, but sometimes it just slips your mind.
For other undergraduates, the video served as a visual aid. Below are two excerpts from undergraduates who used the videos as a visual resource:
I'm more of a visual person, like I'm quite a clumsy person when it comes to manual things. So it's like when I read the lab manual, I may understand but I just don't like… I need to see it for myself, because there are a lot of small details, like I said, like how to clamp this, how to set up the experiment and stuff. So it's not very clear in the lab manual. (Y1-5, informal interview, 17 May 2012)
[S]ometimes when we just read the manual right, we couldn't understand how does it look like, or what we should be doing. Because it's just words. But when it's visual, we can actually know, exactly, at what stage, what are we supposed to observe. Or at what stage, what are the precautions we are supposed to do. Because we actually see a demonstration on how to use the apparatus and stuff. So it acts like a safety precaution for us also, like we know exactly what we need to be careful of, or take note of. (Y2-1, informal interview, 17 May 2012)
As the undergraduates (Y1-5 and Y2-1) had mentioned, there were a lot of details to remember in the practicals. From our baseline study, we observed that since there was only one instructor in the laboratory the undergraduates spent a lot of time waiting for their turn to consult on the expected colour change of the final product to determine the end of reaction, ways to set up the apparatus, and methods to increase the product yield. In the flip laboratory lesson, we observed that a few undergraduates did not wait for their instructors to attend to their queries (lesson observation, May 17, 2013). Rather, they referred to the video or their annotations. As such, all the undergraduates could complete the practical promptly. In the Year 2 the instructor used the remaining time to conduct the post-laboratory debrief on their laboratory performance skills.
In summary, the undergraduates could use the videos to unpack the complex practical procedures by eliciting information that were relevant and useful and reinterpret them to make it understandable in their own terms. This had helped to reduce their anxiety and improve their work efficiency.
The pre-lab actually helps us understand the theory behind the whole lab thing. And then also there were a couple of questions on recryst[allisation] which actually help us to—okay, later when we do a recryst[allisation], we need to be careful on how much solvent we add. So in a way, some of the questions were actually related to the video, but the others are actually theory-based, it helps to supplement each other. Like this one [practical] I know what to do when I come to lab, then the questions help me to understand why: “Okay, this is why I'm using this”. (Y2-4, informal class interview, March 1, 2013)
The above student commented that pre-laboratory questions were complementary to the videos as it checked on the understanding of theories underpinning the steps. This student, who also participated in the baseline study in her first year, acknowledged that she did not understand the theories related to the practicals until after she had performed the task and answered the post-laboratory questions in the laboratory report. In addressing the pre-laboratory questions in the flip laboratory lesson, she was encouraged to read up and understand the practical before performing the task. This finding is similar to Chittleborough et al.'s (2007) study which found that the pre-laboratory questions had provided learners with an additional opportunity to learn.
Conclusion and implications
The focus of this paper was to show how the undergraduates used different aspects of a flip lesson model to support their learning and work in the chemistry laboratory. The undergraduates were provided with demonstration videos of the chemistry practicals and answered pre-laboratory questions related to the theories underpinning the practical procedures before the laboratory lesson. The curriculum time originally spent on lengthier pre-laboratory briefing of the procedures was spent on class discussions related to the procedures and theories before and after the laboratory work. The findings of this study had two implications for chemistry educators—school teachers, university professors, and lecturers.First, we found that by using instructor-narrated demonstration videos of the practicals accompanied by the pre-laboratory questions for discussion, the undergraduates were more encouraged to learn independently and maintain an active cognitive engagement throughout the Chemistry laboratory lessons. Analyses of the lesson videos, interviews, and student artefacts collected in this study showed that these undergraduates had used the demonstration videos to unpack the complex practical procedures—often written in a parsimonious manner similar to the written format in scientific publications. While the format was consistent with the expectations of scientific journals, and these undergraduates are learning to write like scientists, they may not have the prior knowledge and experience that scientists have to figure out the ways to set up the apparatus and detailed steps to execute. In our study, we saw that these undergraduates engaged with the demonstration videos as a resource to unpack and reorganise the information (e.g., using flow charts, diagrams, and annotations) so that the practical procedures became clearer and more understandable to them. Further, the undergraduates developed a better understanding of the theoretical underpinnings of each step when they viewed the videos and answered the pre-laboratory questions. Formerly, the undergraduates answered the questions in their laboratory reports and since they were only assessed based on their written laboratory reports, many of them whom we interviewed acknowledged that they did not think about why they had to perform certain steps during the laboratory work.
Second, this research has shown that flip teaching is suitable for science laboratory learning and is not limited to lecture or classroom contexts. Besides the difference in content, the main difference of a flip lesson demonstration video designed for lecture and laboratory lies in the technicalities (e.g., knowledge of the technical skills, instruments, apparatus, chemicals, and safety issues) and cognitive reasoning on the practical procedures required in the latter. In a laboratory lesson there are a lot more fine-grained details that an instructor has to remind the undergraduates about and one-to-one facilitation is not always easy. Hence, if the undergraduates already know most of the details before they go to the laboratory, it could possibly reduce the undergraduates' cognitive overloading during laboratory work and instructors' rushing about the laboratory to answer undergraduates' questions. Based on our observations of the undergraduates in the laboratory lessons, we saw that they were more confident and would refer to the video when the instructor was busy attending to other undergraduates. This had reduced their wait time and allowed them to progress faster.
As a final note, we want to underscore the point that the effectiveness of a flip lesson is premised on having thoughtfully designed and well-planned pre-lesson tasks that will extend into the face-to-face lesson. We encourage chemistry instructors to rethink ways of implementing their chemistry laboratory lessons and trial one or a few laboratory lessons like what we had done. The findings of this study are encouraging and we have since been teaching preservice teachers about flip teaching and ways to design a flip lesson so that they could use it in their classrooms in future. Nonetheless, we acknowledge that we are unable to generalise the findings of this study to all educational levels and settings as our study was done in a higher education institute where the undergraduates were more mature, independent, and had more practical and theoretical chemistry knowledge. Further, we have only enacted and studied two flip laboratory lessons. We have planned to expand this study to use flip teaching on all the science laboratory lessons in one course and study how the undergraduates respond to it in comparison to other traditional laboratory courses. We hope that more studies could be done to examine the effectiveness of flip laboratory teaching in higher education and school contexts so that there will be breakthroughs in the undergraduates' laboratory learning.
Appendix A: year 1 synthesis of tin(IV) iodide
Practical procedure extracted from the laboratory manual
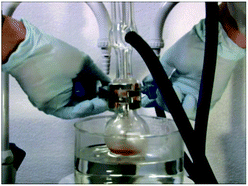
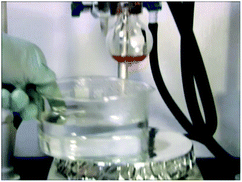
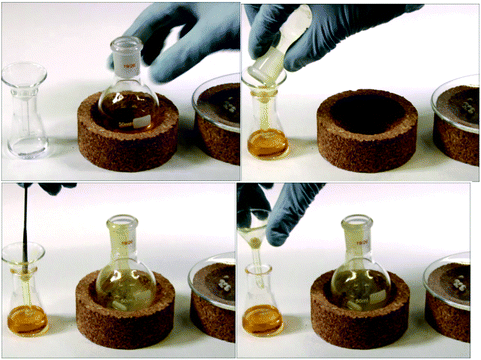
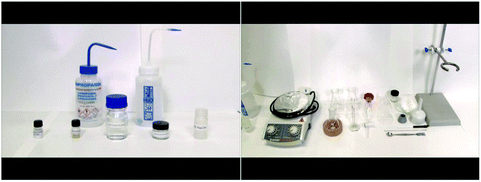
Place 0.119 g (1.00 mmol) of tin, 0.475 g (1.87 mmol) of iodine and 6 mL of chloroform (solvent) into a 50 mL round bottom flask containing a stirrer bar and equipped with a reflux condenser (see Fig. 6).Gently, with stirring, heat the flask and contents using a hot water bath until a mild reflux is maintained. This can be detected through a moderate dripping rate from the bottom of the condenser joint. Maintain the system at the reflux temperature until the reaction mixture turns brownish-orange (∼30 min).
(practical procedure was adapted from Szafran et al., 1991)
Isolation of the product
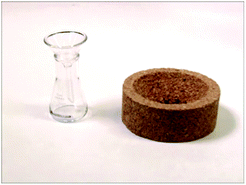
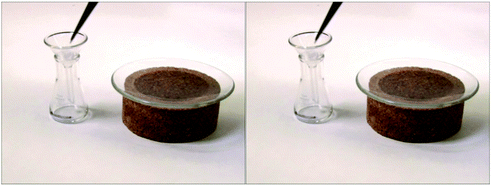
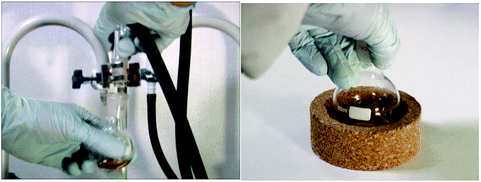
Gravity filter the warm solution rapidly through a loose cotton or glass wool plug using a small glass funnel. Collect the filtrate in a 10 mL Erlenmeyer flask. Any unreacted tin metal will remain in the funnel.Add a boiling stone to the filtrate and concentrate the solution on a steam bath (HOOD!) to approximately 2 mL. Cool the resulting solution in an ice-water bath, and collect the orange crystals of tin(IV) iodide by suction filtration using a Hirsch funnel. Wash the crystals with two 0.5 mL portions of cold chloroform and dry the crystals on a piece of filter paper.
Weigh the product, determine its melting point and calculate a percentage yield.
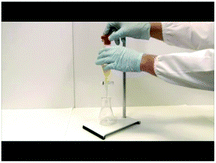
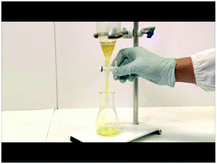
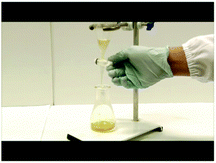
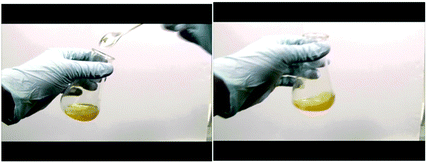
Below are selected screenshots from the flip video on the synthesis of tin(IV) iodide, showing how to filter the reaction mixture after completion of reaction. On the right are transcriptions of the narration corresponding to each screenshot.
Appendix B: year 2 Wittig synthesis
Practical procedure (extracted from the laboratory manual):1. Add 0.50 g of 9-anthraldehyde, 1.06 g of benzyltriphenylphosphonium bromide and 7.5 mL of methylene chloride into a clean dry 25 mL conical flask containing a stirring bar.
2. Stir vigorously. Add 1.25 mL of 50% NaOH dropwise cautiously, being careful to avoid splattering.
3. Stir for 30 minutes.
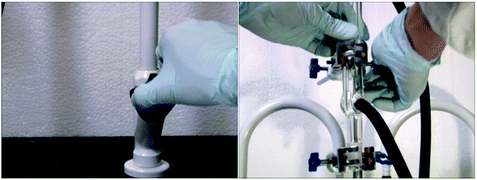
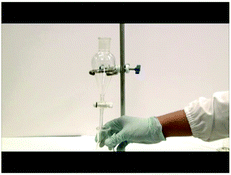
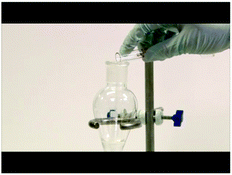
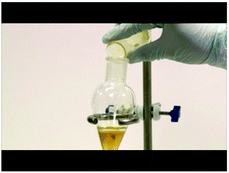
4. Add 5 mL of methylene chloride and 5 mL of water into a 100 mL separatory funnel. Transfer the reaction mixture into the separatory funnel.
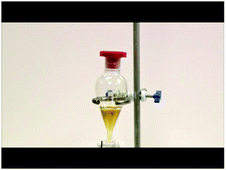
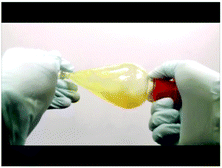
5. Shake, venting often.
6. Allow the layers to separate and remove the lower organic layer into a clean dry conical flask.
7. Extract the aqueous layer with another 5 mL portion of methylene chloride.
8. Combine the organic layers and dry with anhydrous sodium sulphate.
9. Filter the dry organic solution into a 50 mL round bottomed flask and remove the solvent under reduced pressure using a rotary evaporator.
10. Recrystallize the crude yellow crystals from 2-propanol.
11. Collect the crystals using a Buchner funnel and flask.
12. Air dry the yellow crystals and weigh.
13. When the crystals are completely dry, take a small quantity for melting point determination.
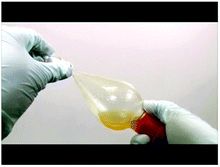
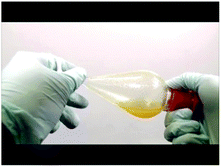
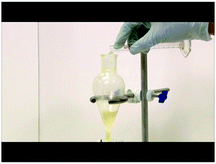
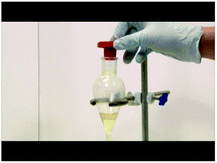
Below are selected screenshots from the flip video on Wittig synthesis, demonstrating the liquid–liquid extraction technique to extract the pure compound.
Acknowledgements
This paper refers to data from the research project “Curriculum Evaluation and Change for a Re-envisioned NIE Chemistry Program” (OER 2/12 TTW), funded by the Education Research Funding Programme, National Institute of Education (NIE), Nanyang Technological University, Singapore. The views expressed in this paper are the authors' and do not necessarily represent the views of NIE. We would like to thank the Centre for e-Learning at the National Institute of Education for helping to make the flip lesson videos.References
- Baker J. W., (2000), The “Classroom Flip”: Using Web course management tools to become the guide by the side, in J. A. Chambers (ed.), Selected papers from the 11th International Conference on College Teaching and Learning, Jacksonville, FL: Florida Community College at Jacksonville, pp. 9–17.
- Bergmann B. and Sams A., (2012), Flip your classroom: Reach every student in every class every day, VA: International Society for Technology in Education.
- Chittleborough G. D., Morcernio M. and Treagust D. F., (2007), Achieving greater feedback and flexibility using online pre-laboratory exercises with non-major chemistry students, J. Chem. Educ., 84, 884–888.
- Davis R. S., Dean D. L. and Ball N., (2013), Flipping the classroom and instructional technology integration in a college-level information systems spreadsheet course, Educ. Technol. Res. Dev., 61, 563–580.
- Flyvbjerg B., (2001), Making social science matter: Why social inquiry fails and how it can succeed again, Cambridge, UK: Cambridge University Press.
- Foertsch J., Moses G., Strikwerda J. and Litzkow M., (2002), Reversing the lecture/homework paradigm using eTEACH® web-based streaming video software, J. Eng. Educ., 91, 267–274.
- Gannod G. C., Burge J. E. and Helmick M. T., (2007), Using the inverted classroom to teach software engineering, Proceedings of the 30th international conference on Software engineering, Retrieved from http://sc.lib.muohio.edu/bitstream/handle/2374.MIA/206/fulltext.pdf.
- Glaser B. G., (1965), The constant comparative method of qualitative analysis, Soc. Probl., 12, 436–445.
- Hart C., Mulhall P., Berry A., Loughran J. and Gunstone R., (2000), What is the purpose of this experiment? Or can students learn something from doing experiments?, J. Res. Sci. Teach., 37(7), 655–675.
- Hodson D., (2005), Towards research-based practice in the teaching laboratory, Stud. Sci. Educ., 41(1), 167–177.
- Hofstein A., Kipnis M. and Abrahams I., (2013), How to learn in and from the chemistry laboratory, in I. Eilks and A. Hofstein (ed.), Teaching chemistry – A studybook: A practical guide and textbook for student teachers, teacher trainees and teachers, Rotterdam: Sense Publishers.
- Johnson L. W. and Renner J. D., (2012), Effect of the flip classroom model on a secondary computer applications course: student and teacher perceptions, questions and student achievement, Retrieved from http://theflipclassroom.files.wordpress.com/2012/04/johnson-renner-2012.pdf.
- Khan Academy, (2013), Khan academy fact sheet. Retrieved from http://https://dl.dropboxusercontent.com/u/33330500/KAFactSheet.zip.
- Lage M. J., Platt G. and Treglia M., (2000), Inverting the classroom A gateway to creating an inclusive learning environment, J. Econ. Educ., 31, 30–43.
- McGivney-Burelle J. and Xue F., (2013), Flipping calculus, PRIMUS, 23, 477–486.
- McNally J., (2006), Confidence and loose opportunism in the science classroom: towards a pedagogy of investigative science for beginning teachers, Int. J. Sci. Educ., 28(4), 423–438.
- Montes L. D. and Rockley M. G., (2002), Teacher perceptions in the selection of experiments, J. Chem. Educ., 79(2), 244–247.
- Nakhleh M. B., Polles J. and Malina E., (2002), Learning chemistry in a laboratory environment, in Gilbert J. K., De Jong O., Justi R., Treagust D. F. and Van Driel J. H. (ed.), Chemical education: Towards research-based practice, Dordrecht: Kluwer Academic Publishers, pp. 69–94.
- OECD, (2006), New Millennium learners: challenging our views on ICT and learning, Retrieved on December 8, 2013 from http://www.oecd.org/edu/ceri/38358359.pdf.
- Pierce R. and Fox J., (2012), Vodcast and active-learning exercises in a “flip classroom” model of a renal pharmacotherapy module, Am. J. Pharm. Educ., 76, 196–201.
- Pink D., (2010), Think tank: flip-thinking - the new buzz word sweeping the US, The Telegraph, Retrieved on February 20, 2013 from http://www.telegraph.co.uk/finance/7996379/Daniel-Pinks-Think-Tank-Flip-thinking-the-new-buzz-word-sweeping-the-US.html.
- Sere M.-G., (2002), Towards renewed research questions from the outcomes of the European project ‘Labwork in Science Education’, Sci. Educ., 86(5), 624–644.
- Smith J. D., (2013), Student attitudes towards flipping the general chemistry classroom, Chem. Educ. Res. Pract., 14, 607–614.
- Strayer J. F., (2012), How learning in an inverted classroom influences cooperation, innovation and task orientation, Learning Environ. Res., 15, 171–193.
- Szafran Z., Pike R. M. and Singh M. M., (1991), Microscale Inorganic Chemistry: A Comprehensive Laboratory Experience, New York: John Wiley & Sons.
- Tiberghien A., Veillard L., Le Marechal J.-F. and Buty C., (2001), An analysis of labwork tasks used in science teaching at upper secondary school and university levels in several European countries, Sci. Educ., 85(5), 483–508.
- Wesch M. L., (2008), An anthropological introduction to YouTube, Retrieved from http://www.youtube.com/watch?v=TPAO-lZ4_hU.
- Wilson S. G., (2013), The flip classroom: a method to address the challenges of an undergraduate statistics course, Teach. Psychol., 40, 193–199.
- Zappe S., Leicht R., Messner J., Litzinger T. and Lee H. W., (2009), “Flipping” the Classroom to Explore Active Learning in a Large Undergraduate Course, Paper presented at the American Society for Engineering Education Annual Conference & Exhibition, Austin, TX.
| This journal is © The Royal Society of Chemistry 2014 |

